Here's what you need:
A 2" diameter PVC coupling
3 "ouchless" (no metal) hair elastics
A short piece of wooden or plastic corner molding
A spring-type mic clip

Superglue or epoxy
Let's start with the PVC coupling. I use the grey electrical couplings instead of the white plumbing couplings because the electrical ones are shorter for a given diameter. If you're working with longer mics or can't find the grey stuff, go for the white.
First thing to do is to figure out the circumference of the coupling (C = pi x D, remember?) and divide it by 6. Now make marks on each end of the coupling dividing it into 6 roughly equal parts. An easy way to do this is to mark a strip of paper appropriately, then wrap the paper around the coupling and use it as a template for making your marks. Oh, did I mention that the marks on both ends need to line up with each other? Precision isn't crucial on this project, but try to get as close as you can.

Next thing is to cut notches at each of your marks. Notches should be between 3/16" and 1/4" deep and should have steep sides. I use the cutting wheel on my Dremel tool to make the notches. This is quick and easy but produces a lot of plastic dust, so be sure to wear a dust mask. Now it's time for the corner molding. Corner molding is decorative trim for home, office or trailer. It has a nice interior curve to it, comes in wood or vinyl, and is available at your neighborhood hardware superstore. Take your corner molding and cut off a section that is the length of your coupling. Lightly sand the curved portion to prepare it for gluing.
Superglue or epoxy the molding along the length of the coupling, making certain to place it squarely between two notches. If you're like me and end up with two notches a little further apart than all the rest, glue the molding between those two. Super glue can make assembly faster due to its short drying time, but epoxy will provide a more durable adhesion. While the glue is drying, check and see if there are a couple of squishy pads on the inside of your mic clip. If there are, remove them as well as any residual adhesive that might linger in their absence.
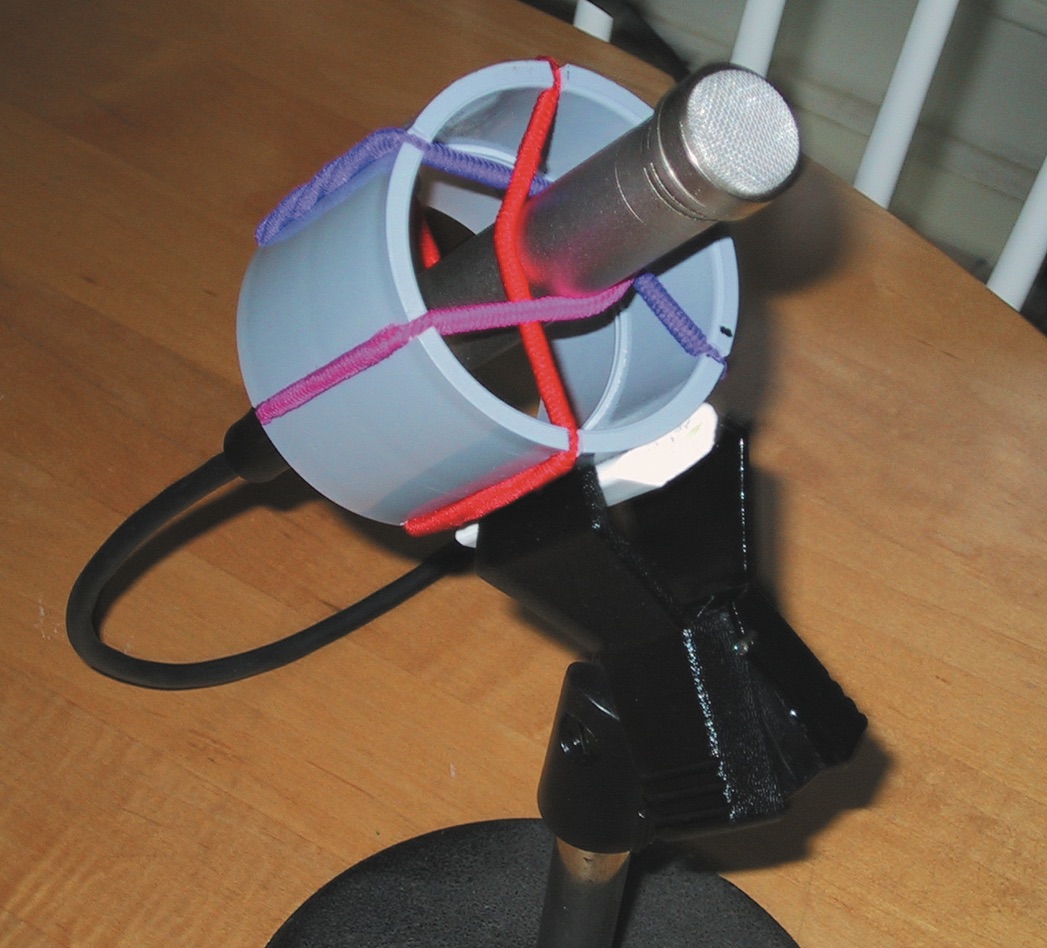
Now, once the glue is dry on the coupling and molding, it's time to glue on the mic clip. Lay a bead of glue along both sides of the molding where it joins the coupling, clamp the mic clip on and let it dry for a while. Now all that remains are the little elastic hair thingies. Slip them into the notches on your coupling, et voila! You have now completed your first DIY microphone shock mount. All that remains is to screw it on a mic stand and weave a microphone through the intersection of the hair thingies.
TIPS AND CAVEATS: This thing holds a mic pretty securely, but you might want to experiment a bit and see how it works with the particular microphones you'll be using. If you're using a particularly heavy mic or putting the microphone in a somewhat precarious position, it's not a bad idea to twist a spare hair thingy around the mic to give it a little extra resistance to slippage. Also, the 2" couplings work best with skinnier mics — they're great for small diaphragm condensers. For side address large diaphragm mics, like the MXL2001, use a 2 1/2" coupling instead.